Categories
3D Modelling

RC Car Animation

The VFX Compositing assignment for the first term of my second year at university was to plan, shoot, edit and render a composite shot of a three-dimensional remote-control car into a location from around campus. Overall, I’m very pleased with my final outcome, and thoroughly enjoyed the assignment. It was a first proper taste of what it would be like to work on a visual effects shot for a film.

colour-chrome.png

The first stage was to decide on a location and collect all the relevant information. I chose a bench as I wanted the car to circle around and go underneath it. After setting up the Sony FS-7 camera and tripod, I identified a baseline and measured the dimensions of the bench and the distance from the camera to ends of the baseline. I then filmed a series of reference shots, using a chrome ball, grey ball and colour chart that I can refer to later in the process. Finally, I took a panoramic High Dynamic Range Image (HDRI). This involved taking a series of photos at a range of different exposures, at 60 degree intervals. These images were then stitched and combined using HDRI software PTGui. I created an undistorted version of the backplate footage using a 35mm Lens Grid to assist me with camera matching.

The next step of the process was to add the 3D car to the blank backplate that  I filmed on location. In order to do this successfully, the dimensions and baseline measurements helped me to match the real life camera to a virtual camera in three-dimensional design software Maya. Once the cameras were lined up and matched, the rest of the bench geometry was then modelled. The car was then referenced into the design space and animated to follow a specific path through my scene, looping around and under the bench. Using VRay Object Properties enabled me to generate correct shadows for underneath the car, and the shadows that the bench would cast on the car itself. I then used two render layers to export a Beauty Pass and Shadows Pass.
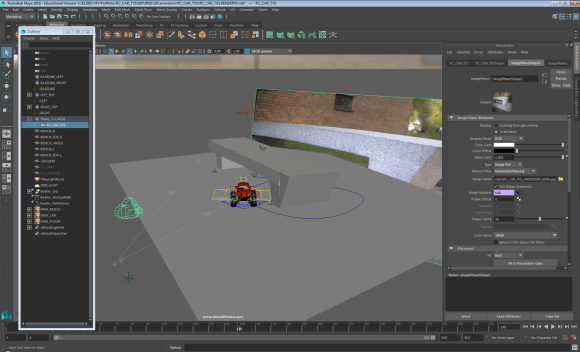
picture1

The final stage was to composite the finished shot using Nuke. As well as the two render layers, I also exported a number of AOVs or render elements, including Reflections, Refractions, Specular, Lighting, Velocity and zDepth. These needed to be distorted to match the original backplate footage, before I built up the car element by element. The only task left was to render from Nuke to a HD 1920 x 1080 H.264 file.

Filming – Compositing – HDR Images – Network Rendering – Maya 2017 – NukeX – PTGui – Undistorting – Camera Matching – Animating – Keyframing – AOVs – Stitching Panoramas – Render Layers – VRay

Categories
3D Modelling Photoshop

CGI Gramophone

Render2_shadow

Our 3D composite image task required us to design, create, texture and light a three-dimensional object and then insert it into a background image. I chose to create a gramophone as they are unusual objects with a fairly complex design.

I used computer-modelling software Maya to make a basic skeleton for the gramophone using a range of tools and processes. Then, using textures I found on the web, I applied the wood and brass effect to the different parts. After inserting the background image and positioning the gramophone correctly, I worked on correctly lighting the scene based on the light sources already in the image, such as desk lights and open windows.

The final two compositions required me to insert a shadow using Photoshop to make the images more lifelike, however in the future I’d like to experiment and play around with more features in Maya, so that the shadow could be created on the surfaces automatically.

Render1_shadow

Categories
Photography

Trails

trailsThis image was created in Photoshop using multiple long-exposure shots. The differing opacities creates a sense of depth and makes the image more interesting to look at. I tried to change the colours of some of the light trails but in the end decided the effect detracted from the overall image.

Categories
Photography

Laura

lauraUsing a softbox light to the right and a strobe with a colour filter to the left of the shot created a strong divide on Laura’s face. After experimenting with several colours including orange, green and purple, we settled on red as it gave a spooky effect for the photo. I accentuated the red slightly using Photoshop.

Categories
Photography

Silhouette

silhouetteThis photo features Kira from another photo in the Studio Portraits section. She is silhouetted behind a light, which was linked to the camera using a sync cable. A green filter was covering the light, and the saturation of the green was enhanced when I edited the photo later.

Categories
Photography

Lankitha

Lankitha

I attempted to recreate the Rembrandt lighting effect with this studio portrait of Lankitha – there is a clear triangle of shadow on her right cheek. This photo required very little editing and processing.

Categories
Photography

Seb

Seb

For the Digital Portfolio, one of the photography themes that I have picked was studio portraits. This photo shows Sebastien posing in the studio. Using a single light and a low camera angle, it gives the impression of scale and intimidation. I removed the background lights and ceiling using Adobe Photoshop.